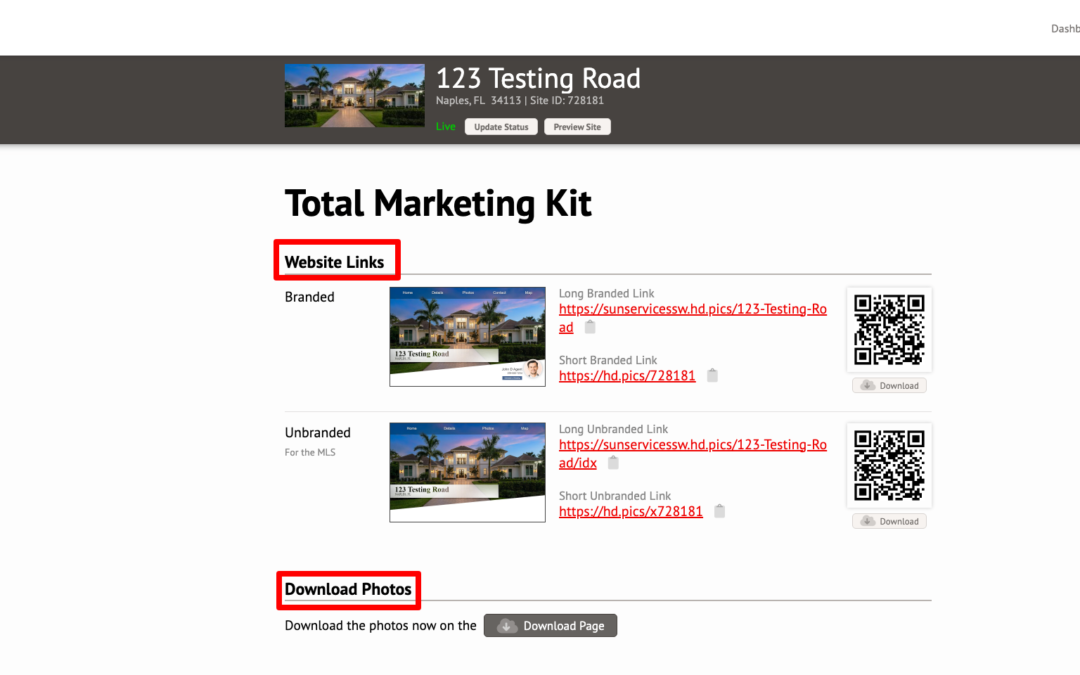
Get the most out of your listing site and total marketing kit
- Quickly Add Listing Details
- Re Arrange & Hide or Show Media
- Set Up Weekly Traffic Reports
- Create Lead Captures
- Create Print Materials & Flyers
- Create Social Media Post Materials
- Adjust Listing Site Design Settings
Getting Started – Your Dashboard:
First step in customising your listing site & marketing materials is to log into your account. If you are not certain how to do that click here.
In your Dashboard you can:
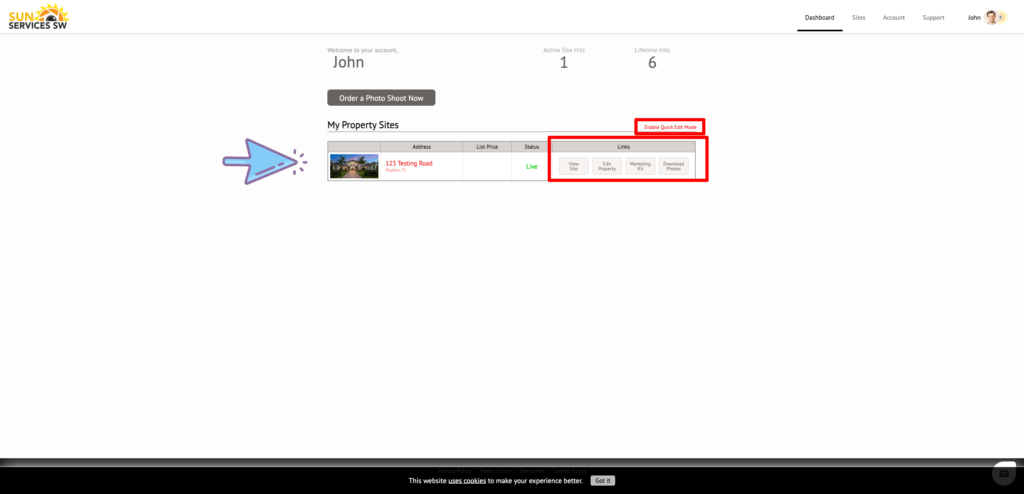
- You can access your current active listings. Any sites that are “Offline” will found on your “Sites” tab in the top menu.
- Use your “Quick Edit” mode to add: List Price, MLS# and adjust the Banner announcement (“For Sale”, “Just Listed”, “Rental”, etc)
- You also have links to View Site, Edit Property, Marketing Kit & Download Photos from here.
- Click on your Property Site and go to your Site Summary to get into more advanced options.
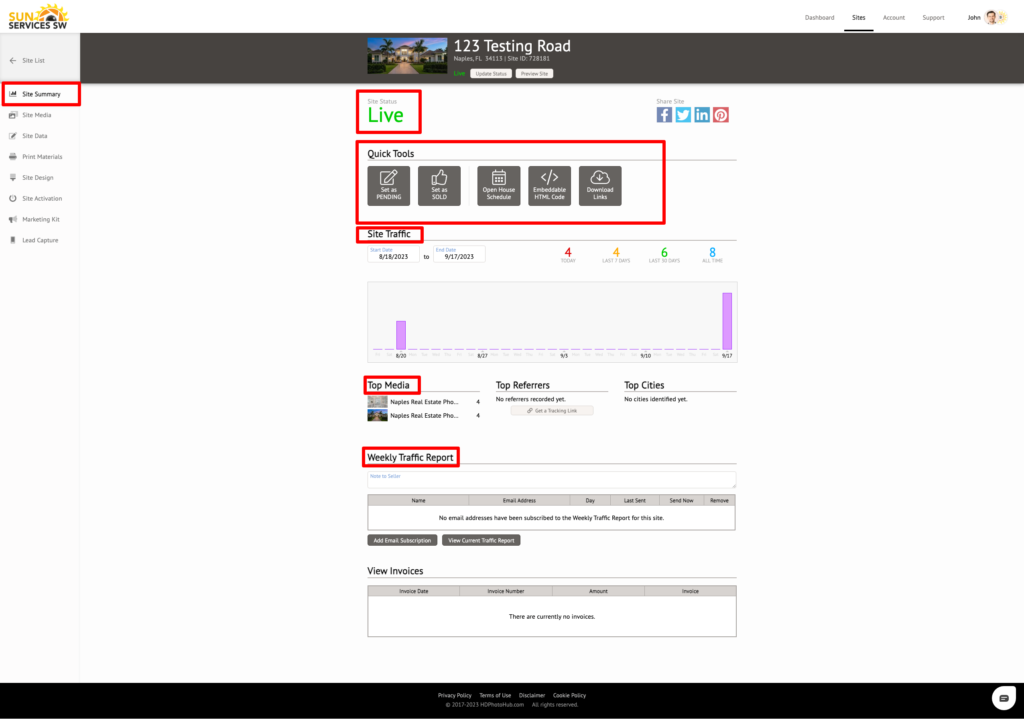
Moving Along- Your Site Summary:
In your Site Summary tab you have the general status of your listing site.
You can also:
- Use a set of Quick Tools to change the status of your listing, schedule an open house or, for advanced users add embeddable HTML Code.
- View current site traffic
- See top media viewed
- Set Up Weekly Traffic Reports
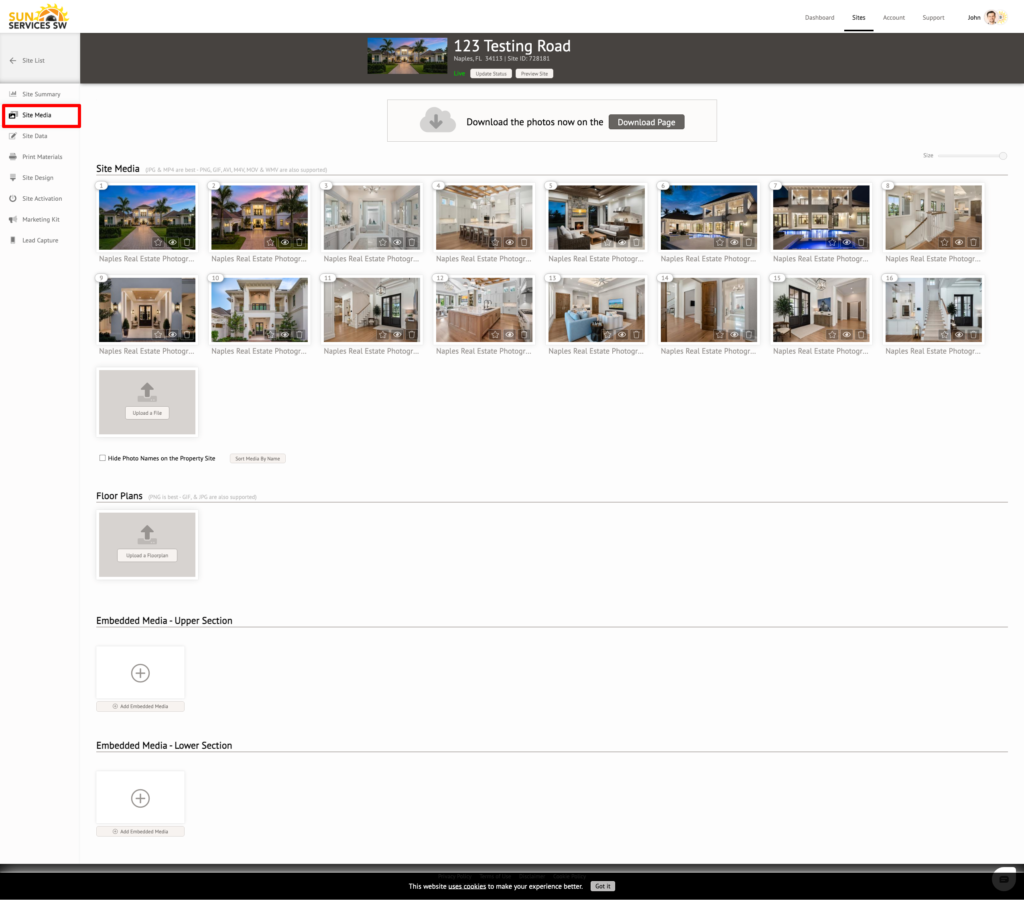
Next Up – Site Media Tab:
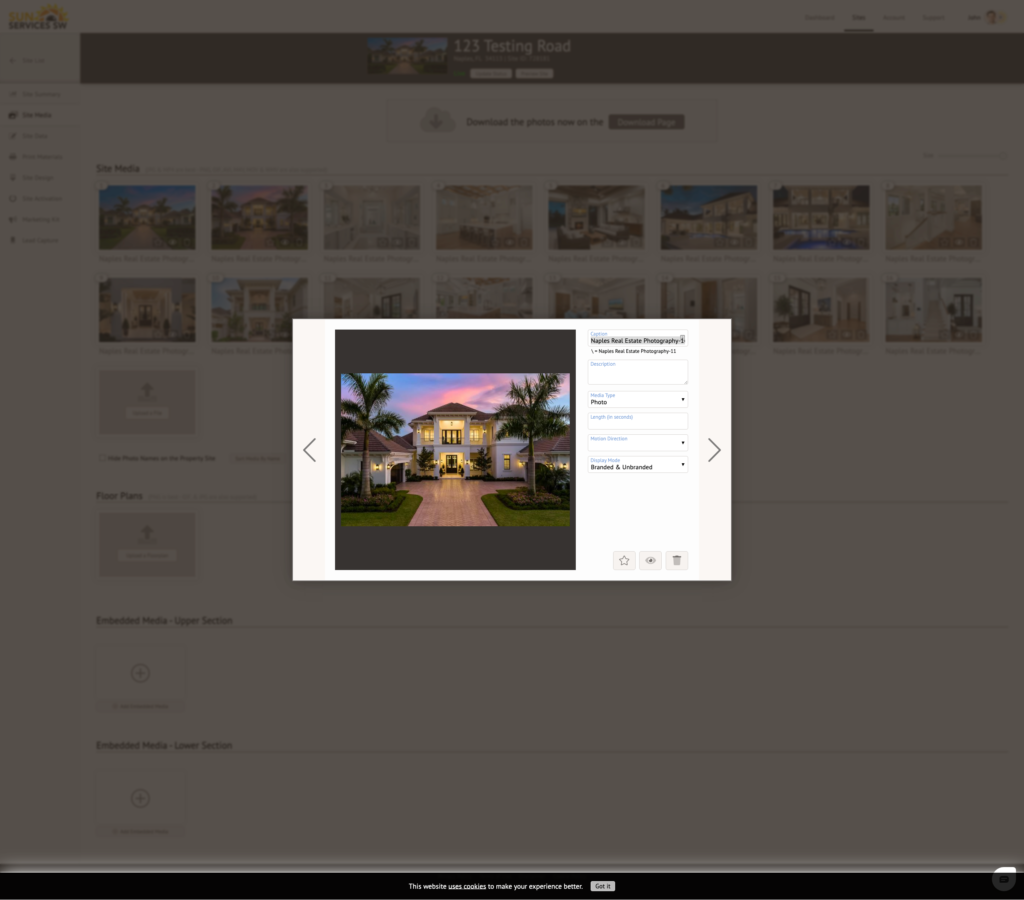
This is where all of your media can be found including Photos, Videos, Floor Plans, 360 Tours or any other media we created for your listing. NOTE: Some media may be greyed out when delivered. This is so it is not duplicated on the listing site, i.e. videos or floor plans that are embedded in the site. However, these files are still available for downloading.
Rearranging Media: When your listing site is viewed, the photos will be shown in the exact order they are in the Site Media section. To rearrange the order, simply drag and drop the photos into the order you want. (select multiple photos by clicking an area and dragging a box around more than one photo)
NOTE: Click on each individual file for more advanced options such as changing or adding a description, hiding the media from your listing site or using the star icon to mark it as a “favorite”
Here you also have access to your download page. (More on that next)
Next Up – Your Download Page:
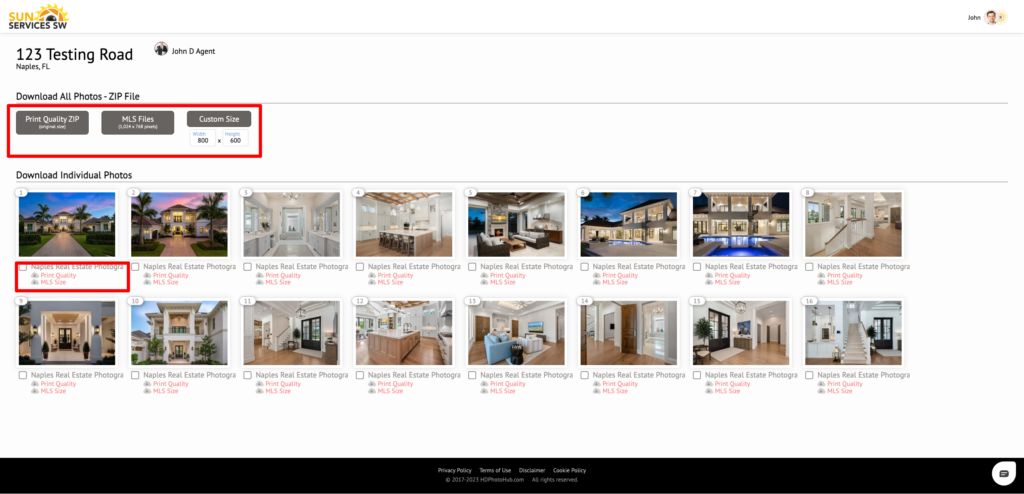
You can access your download page in a few places, but the most common are in your Notification Emails sent to you when your media was delivered or your Dashboard or your Site Media Tab.
Here you can download your media directly to your computer:
- Download All Files in Print Quality, MLS Files size, or Custom Size.
- Click on an individual image or video to download that file by itself.
- Use the red download link under a file to download either Print or MLS size of that image.
NOTE: When downloading your files from the download page, it will automatically download the file(s) to your local computer drive wherever your default download location is. Different browsers may show this in different ways, but you can always find the files in your “downloads” folder.
Also, if you haven’t changed the Media Caption, you can find the files by doing a search on your computer for the property address.
Next Up – Your Site Data:
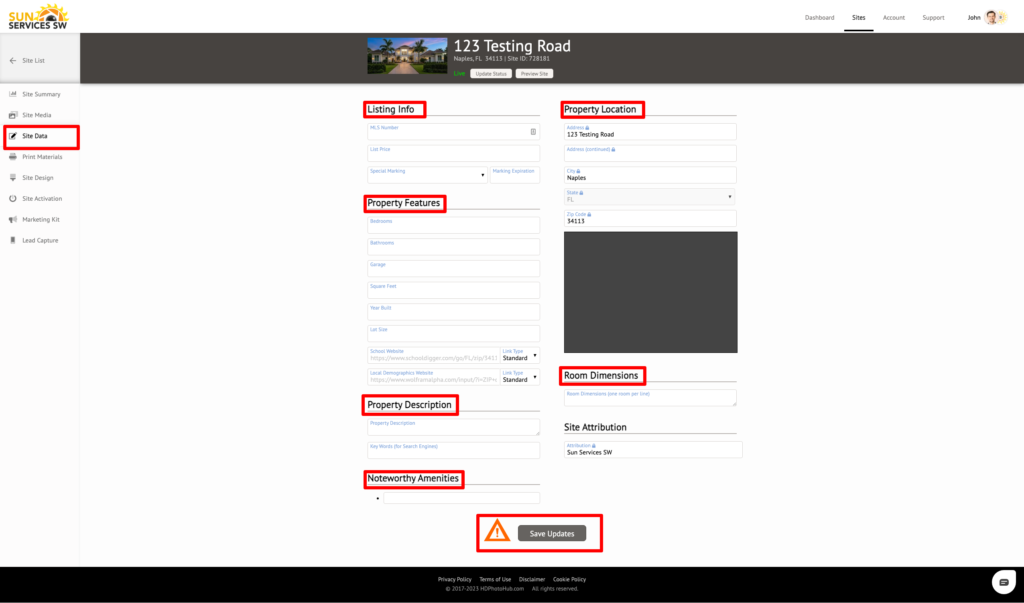
Your Site Data page is where you will add all the important information regarding the listing property itself:
- Listing Info – MLS Number, List Price & Special Marketing info (Just listed, Rental, Sold etc) that shows in your heading banner.
- Property Features – Number or bedrooms, bathrooms, Garages, Sq Footage, Year Built & Lot Size.
- Property Description – This is a good place for your MLS description.
- Noteworthy Amenities – This creates a bullet list of noteworthy property features
- Property Location – This will be locked after a certain period but can be adjusted by contacting us.
- Room Dimensions – This puts certain room dimensions as features on the listing site
- Site Attribution – For advanced use (single property listing sites can be added)
NOTE: Don’t forget to SAVE Updates! Any fields left empty will not populate into the listing site.
Next Up – Your Print Materials:
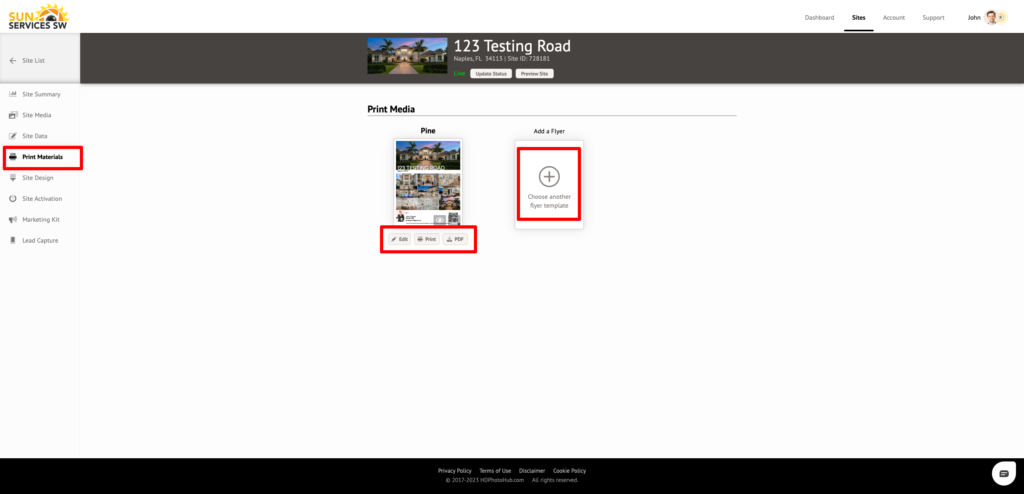
Your Print Materials tab brings you to your listing flyers page where you can:
- Choose one of many templates
- Customise the templates
- Change the photos and text of your flyers (drag and drop)
- Print or save files to send to printer.
Next Up – Your Print Materials:
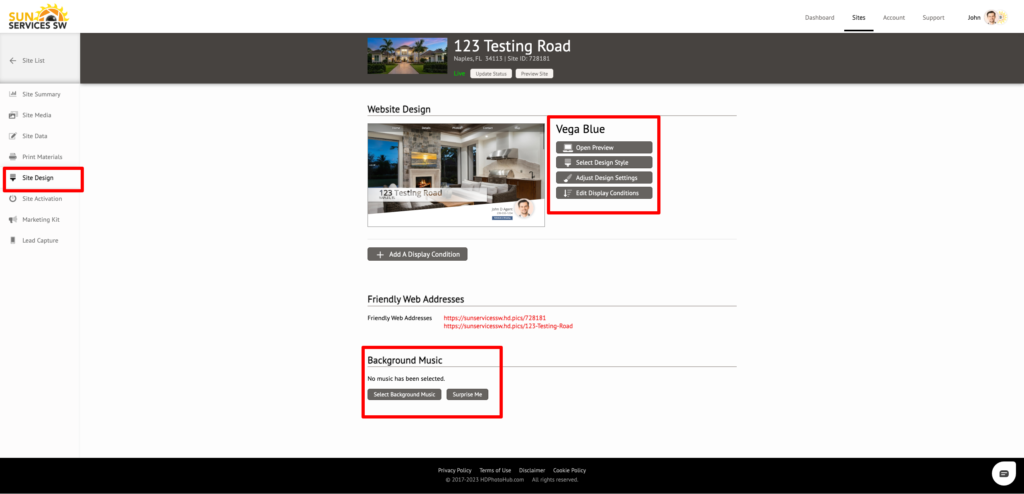
Your Site Design tab is where you can change the look and information displayed on your listing site:
- Preview your site
- Select Design Styles
- Adjust Design Settings
- Edit Display Conditions
- Select Background Music
NOTE: The design styles and settings are advanced features that may require some exploration before understanding. Changing them is fairly easy and nothing that is done, can’t be undone.
Next Up – Site Activation:
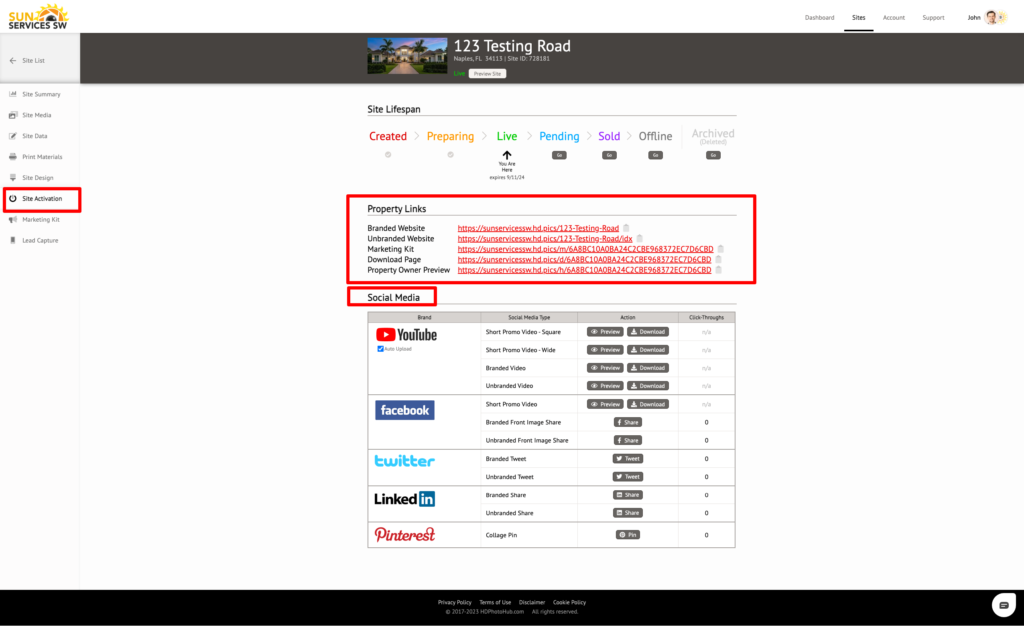
On your Site Activation tab you can:
- See the current status of your listing site
- View the site lifespan or history
- Copy any of the listing sites website links, owner preview or download page
- Download any social media content created in your Marketing Kit
Next Up – Your Marketing Kit:
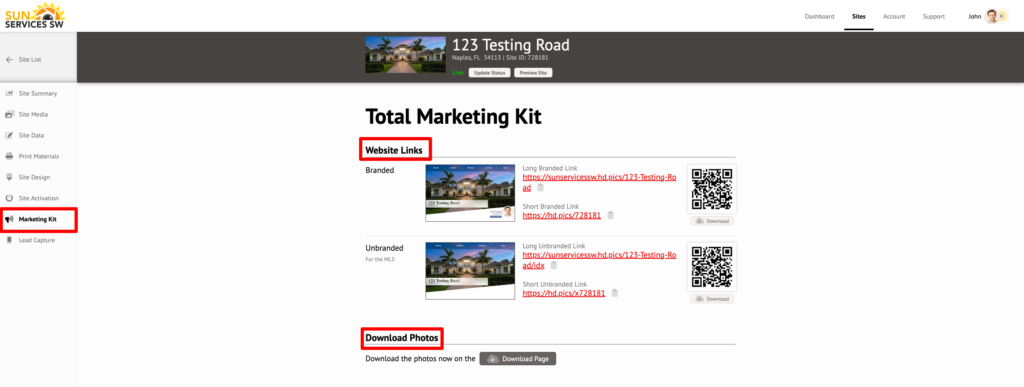
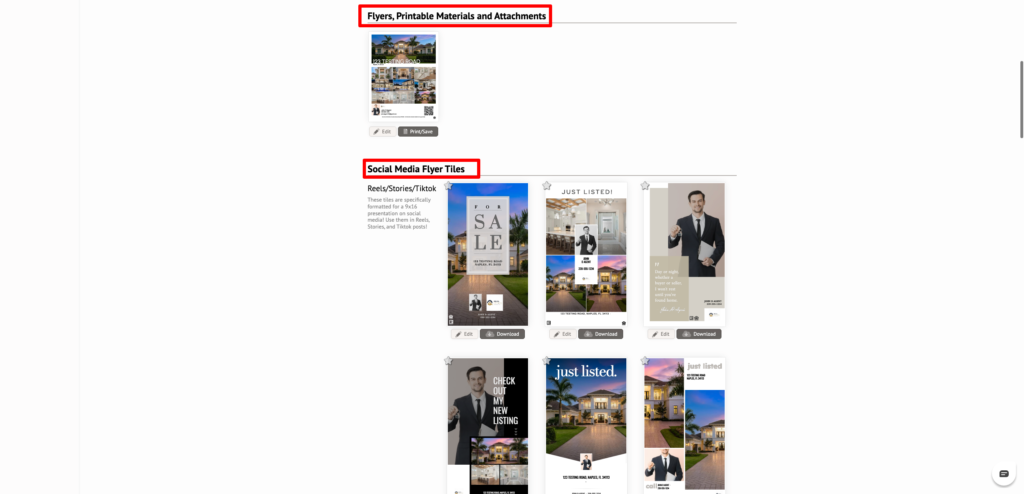
Your Marketing Kit is where you are going to find all of your marketing materials and access to the most important parts of your listing materials:
- Website Links (Branded, Unbranded for MLS in long and short forms)
- Download Photos page link
- Flyers, Printable Materials & Attachments to listing site
- Social Media Flyers Tiles – Customisable social media posting templates
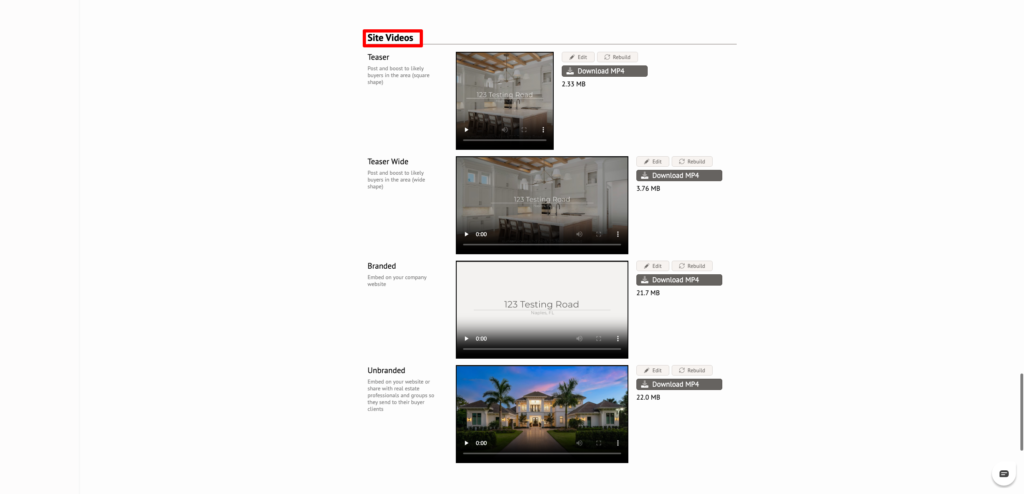
- Site Videos – Videos created from the listing Photos & Media (teasers, branded, non branded, etc)
NOTE: There will be a separate tutorial on the Total Marketing Kit coming soon. If you have any questions please contact us.
Next Up – Lead Capture:
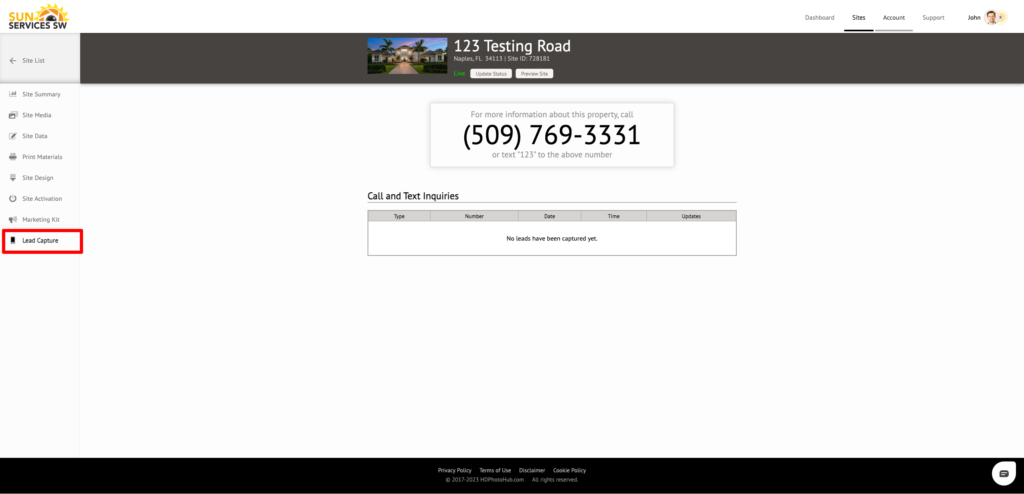
Your Lead Capture tab is where you can create a “for more information” telephone number to automatically send a text message out with the listing site information & collect lead contact info.
If you have any questions or would like to schedule a one on one with us and go over the Total Marketing Kit, or any other aspect of your listing marketing please contact us.
